
There’s something truly nostalgic about a family lemon curd recipe — or lemon honey, as we always called it in my family. This version is based on my Nana’s recipe, which she made often and always shared in small jars — they were given and received like prized possessions.
Lemon curd is delicious on hot buttered toast, but it’s just as lovely as a cupcake or slice filling, spooned into tart cases for a quick dessert, or drizzled over pavlova or ice cream like a lemony sauce. Best of all, it freezes beautifully — so I recommend keeping one jar in the fridge and tucking the rest away for later.
This is an old-fashioned lemon curd recipe using lemon, sugar, butter and eggs — all the good stuff!
🍋 You can access a FREE printable recipe card below but scroll down for lots of tips for success, step-by-step instructions, and jar recommendations for freezing and canning lemon curd.
Want to add this recipe to your file? Add your email address below and we'll send it directly to your inbox. Check your Promotions or other folders if you don't spot it straight away.
This isn’t just any lemon curd recipe — it’s been tried and tested by home preservers and bakers who love its balance of flavours and reliable results. Some have even had their children make it with great success!
I’ve adapted it from my Nana’s original lemon honey recipe, making it slightly less sweet and more tart, while still plenty sweet enough to satisfy. It uses whole eggs (no leftover egg whites to figure out!) and includes detailed steps and tips to help you avoid common pitfalls — like curd splitting or ending up with little bits of cooked egg.
Whether you’re a first-time maker or an old hand at preserves, this lemon curd is designed to be foolproof, silky, and delicious every time.
Before you get started, here are a few helpful tips to make sure your lemon curd turns out silky, smooth, and delicious every time:
If you don’t have a double boiler, you can easily set up your own by placing a heatproof bowl or slightly larger pot over a pot of simmering water. This helps prevent direct heat, which can cause curdling.
Whisk the eggs first, then pass them through a sieve — you’ll notice little bits of egg left behind that would have caused stringy or eggy bits in your curd.
In this initial step, you just want to melt the butter and dissolve the sugar. This avoids the mixture being too hot when the eggs are added.
Take the pot off the heat when adding the eggs for better control. Add the eggs slowly, whisking vigorously and constantly as you pour.
Once the eggs are in and you return the pot to the heat, stir constantly. A whisk works well at first, then switch to a wooden spoon with a flat end to gently scrape and stir the thickening curd from the base
Cook your curd low and slow — turning up the heat to hurry things along can lead to splitting or a grainy texture.
If you spot any cooked egg bits, you can pass it through a fine mesh sieve if you want. This will also remove the zest, but you will still get the flavour benefit from the cooking. With the initial sieving and careful addition of the eggs, you should find this to be unnecessary.
The curd is ready when it coats the back of the spoon and you can run your finger through it, leaving a clean line that doesn’t rush back together.
The following are my favourite tools to use when making lemon curd:
This recipe makes approx. 3x 250 mL jars of lemon curd.
Wanting to freeze the curd?
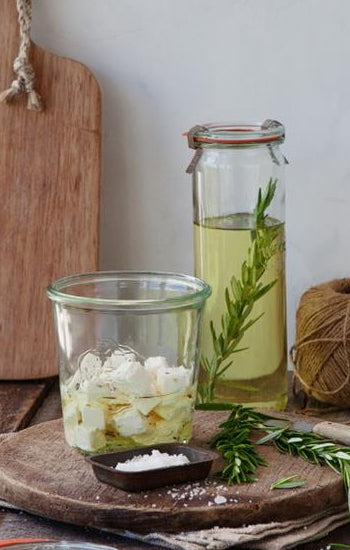
Use the 275 mL Le Parfait Super Terrine jars or Weck Mold Jars / Weck Mini Mold jars — all have straight sides which make them suitable for freezing. For Weck jars, I recommend pairing them with the Weck Keep Fresh Lids.
Wanting to water bath can the curd?
You can use any preserving jar in whatever size works for you. Given this is a rich preserve, 125 - 275 mL sized jars are usually the best choice.

I love using this whisk when making lemon curd! I use it in the full balloon position when whisking the egg and adding it to the lemon, sugar, and butter mixture. Once the egg is fully mixed through, I switch to the half open whisk position for the rest of the cooking. A great whisk which folds flat for easy storage — plus, it’s designed so you can easily remove curd from it.
Makes juicing bulk lots of lemons easy, with maximum juice extraction and minimal mess.
A sharp zester that gives a super fine zest with minimal pith, delivering all the flavour without bitterness.
Helps fill jars cleanly and easily, especially when working with hot curd. You won't need a ladle as it will pour nicely directly from the pot.
Provides gentle, even heat — essential to prevent curdling.
Perfect for straining the whisked eggs to remove any stringy bits, ensuring a silky-smooth finish.
Ideal for scraping the base of the pot as the curd thickens so nothing sticks or scorches. A flat, pointed end wooden spoon is especially good for getting into corners.
3x 250 mL jars


Freezing lemon curd is an easy way to extend its shelf life, and it thaws just like a freshly made one. To freeze safely, use straight-sided jars to prevent cracking and always leave at least 1.5 cm (½ inch) of headspace to allow for expansion. I personally prefer the 275 mL Le Parfait Super Terrine jars, as their glass lids mean there’s nothing to corrode in the freezer. Weck Mold and Mini Mold jars are also excellent choices for the same reason — best used with the Weck Keep Fresh Lids.

People often wonder if you can make lemon curd shelf-stable — the short answer is yes, but it's a little nuanced.
The National Center for Home Food Preservation (NCHFP) has a tested lemon curd recipe specifically designed for water bath canning. If you follow their guidelines, the filled jars are processed for 15 minutes for half-pint (250 mL) jars, with adjustments for altitude if needed.
However, one downside of storing lemon curd in the pantry is its fairly short shelf life — the NCHFP recommends using canned lemon curd within 3-4 months, as the quality can decline over time.
Personally, I don’t recommend water bath canning lemon curd. You get a much longer shelf life by freezing it, with no noticeable change in quality — even after a year in the freezer.
Lemon curd is amazing on hot buttered toast, scones, or crumpets. Spoon it into tart cases for a quick dessert, swirl it through yoghurt, or use it as a filling for slices and cupcakes. Remember Louise Slice from your childhood? That’s the one with the biscuit base, jam layer, and coconut meringue on top — try swapping the jam for lemon curd to make a gorgeous lemon meringue slice. It’s also delicious drizzled over pavlova or ice cream — yum!

If you love our lemon curd recipe, you're going to love our lime curd recipe too! If your garden is loaded with citrus, you might also like our bottled grapefruit juice recipe - great to add as a mixer with drinks over summer.
I hope you enjoy this lemon curd recipe (or lemon honey as I always knew it to be) — if you have any questions, please feel free to ask below.
This blog post was originally published in August 2019 and updated in July 2025 with new photos, tips, and a printable recipe card!


Comments will be approved before showing up.


Kylie
September 22, 2022
Hi Andrea. I would happily keep this in my freezer for a year and in the fridge for about 6 months. My preference is the freezer as it stores very well in there and thaws like a freshly made one. Happy preserving! Kylie